


In one of my previous articles, I made emphasis on the fundamentals of testing and why developers should write more tests. Well, the latter is just what we're going to be doing in this tutorial...Writing tests!
In this article, I'm going to show you how to set up a test environment and write tests for your Reactjs component using jest and react-testing-library.
Now a quick overview of what jest and matchers are before we start using them to write tests.
Jest
Jest is a javascript test runner maintained by Facebook, it is used for creating and running tests.
Using Matchers
Jest uses matchers to let you test values in different ways, understanding how matchers work will help you write better tests.
Matchers are basically methods you can use to validate different things, but to access these matchers you need to use the expect function.
There is a wide variety of things you can use matchers to check or compare but I'm going to mention a couple I got from the official Jest documentation, you can visit the documentation for more.
Truthiness
In tests, you sometimes need to distinguish between undefined, null, and false, but you sometimes do not want to treat these differently. Jest contains helpers(matchers) that let you be explicit about what you want.
For example:
test('null', () => {
const n = null;
expect(n).toBeNull(); // this will pass
expect(n).toBeDefined(); // this will fail
expect(n).not.toBeUndefined(); // this will fail
expect(n).not.toBeTruthy(); // this will fail
expect(n).toBeFalsy(); // this will fail
});
I'm pretty sure with the block of code above you must have gotten the concept of expect and matchers and how they work. let me show you another example, this time with numbers.
Numbers
expect gives you access to a variety of methods you can use to compare numbers. here are some examples...
test('two plus two', () => {
  const value = 2 + 2;
  expect(value).toBeGreaterThan(3); // this will pass
  expect(value).toBeGreaterThanOrEqual(3.5); // this will pass
  expect(value).toBeLessThan(5); // this will pass
  expect(value).toBeLessThanOrEqual(4.5); // this will pass

  // toBe and toEqual are equivalent for numbers
  expect(value).toBe(4); // this will pass
  expect(value).toEqual(4); // this will pass
});
I hope that with these two examples, you've grasped how expect and matchers can be used to compare values and write a good test, just like I mentioned earlier, you can compare different values, including strings and booleans, Jest gives you matchers for them. You can check the Jest official documentation for more.
Setting up testing environment
Setup with Create React App
If you are new to React, I recommend using Create React App. It is ready to use and ships with Jest!
Testing a React Component
In this tutorial, we're going to test a simple note-taking reactjs component, this is what the component looks like...I'll drop the link to the GitHub repo at the end of this article.
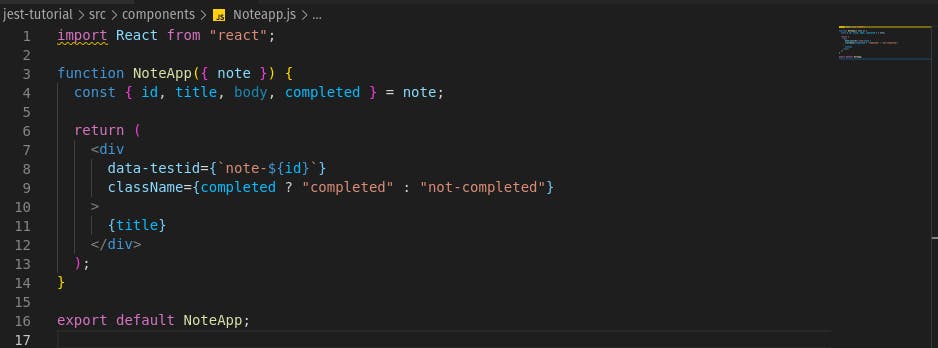
The image above shows a simple note-taking component, that accepts some props, it's just a normal component with a ternary operator that sets the className to "completed" if the completed prop is true and "not-completed" if it is false.
Something you might be new to is the data-testid attribute, this is very important when writing tests in react.
Adding a data-testid attribute is a way to identify a DOM node for testing purposes, its a common tool recommended by many (testing-library, cypress) as it decouples the DOM structure of your application from its tests. When working with React, setting a data-testid on a DOM node (a host component) is easy: you just… set it source
Now without further ado let's set up the test file and start writing test for this simple note component.
Step 1
Create a test file with the .test.js file extension, naming your file this way helps jest recognize and run your test file. for example, I named the test file for this tutorial noteapp.test.js
Step 2
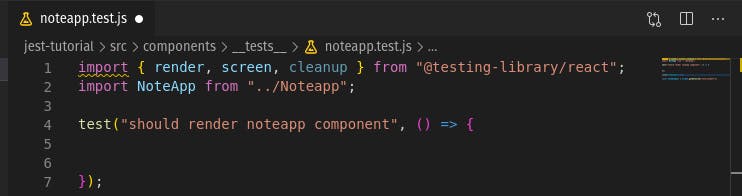
Import the component you want to test.
import render, screen and cleanup from @testing-library/react
render renders the React component in a virtual browser and screen is used to access the rendered DOM. cleanup unmounts react component that were rendered by render, failing to call cleanup when you've called render could result in a memory leak.
If you're using the Create React App project set up then you already have this module installed in your application but if you're not using it, don’t forget to install the test library using this command.
npm install @testing-library/react --save-dev
Start writing a test by using the test function, it accepts two arguments, first the name of your test and a function as the second argument, this is where we'll be writing and comparing values.
Step 3
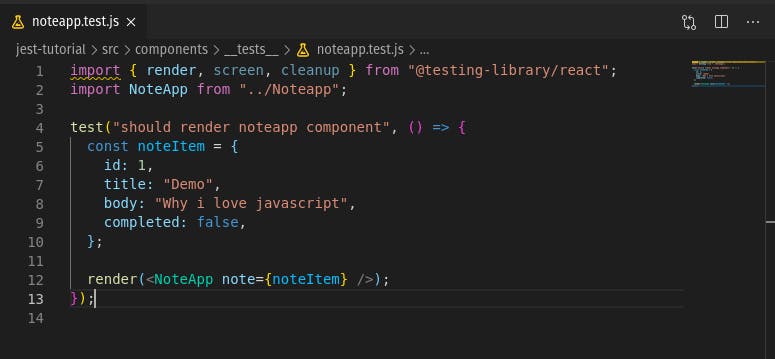
In this step, the first thing I will be doing is set up the props for my component because my component expects props. after that...
use the imported render function to render the imported note-taking component.
Step 4
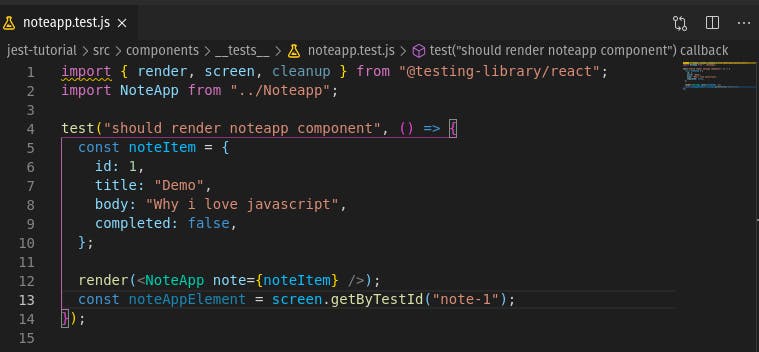
The screen function returns a set of methods we can use to make assertations on the rendered component and one of them is getByTestId.
This function accepts the "data-testid" attribute from earlier and returns the DOM instance of the element. So you have to store this DOM instance in a variable to use it to compare the values it contains with appropriate matchers.
Step 5
Now time for the first test, in this step I'm going to check if the title has the text content "Demo" with the toHaveTextContent matcher.
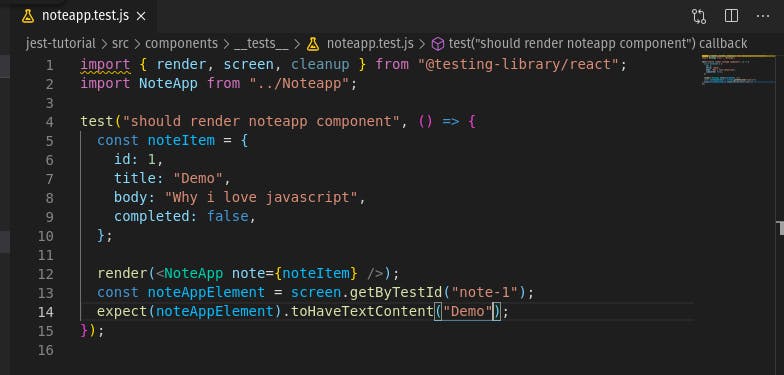
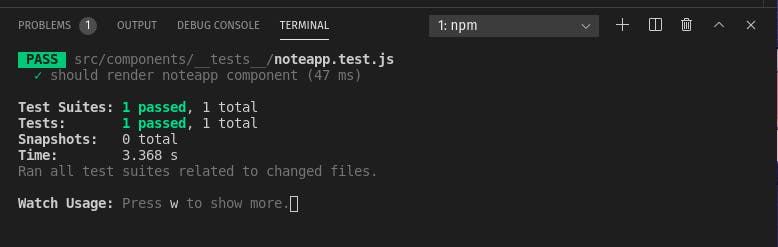
and without any surprises, when I start the test by running npm test on my terminal, it passes. Because "Demo" matches with the title.
Let's take this test one step forward by writing a more advanced test, this time I'll be writing a test that checks the className of the component, remember the className is dynamic, it should be "completed" if completed is true and "not-completed" if completed is false.
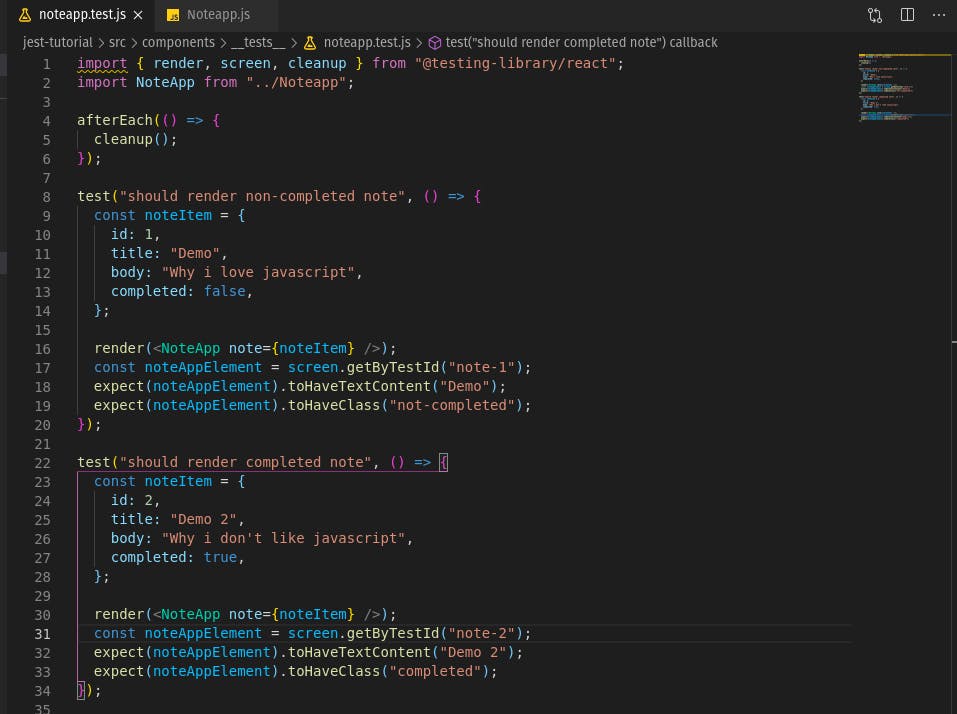
In the first test you can see that I used the toHaveClass matcher to compare the expected className. In this case both of our test should pass because if completed is false the expected className should be "not-completed", and if completed is true the className is "completed". Remember that all this is coming from our imported component.
And if you also look at the beginning of the code, I used an afterEach function to run the imported cleanup function. This simply means, after each test, the cleanup function runs, this is a good test practice to avoid memory leak and just let the tests start on a clean slate.
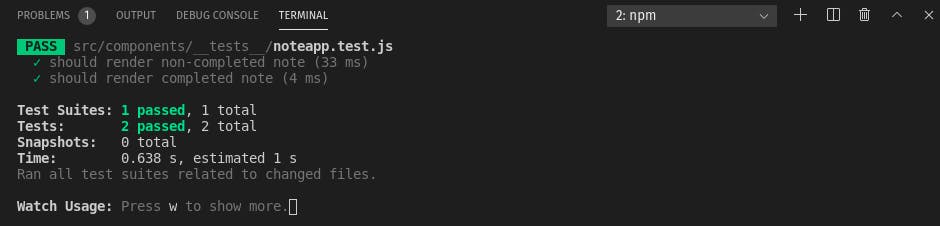
Now when I run this test, you can see that it passes as expected.
There are so many matchers you can use to compare certain values in your react component, you can find some of them here, I would recommend you play around with some of them, might come in handy in the future.
Conclusion
Testing is a big and fascinating topic. There are many types of tests and many libraries for testing. In this tutorial, you learned about how to use jest and react-testing-library to write and organize a simple unit test and how to test React components.
You can find the code for this tutorial on Github
Please, feel free to ask if you have any questions in the comment section.
Thanks for reading, see you soon!